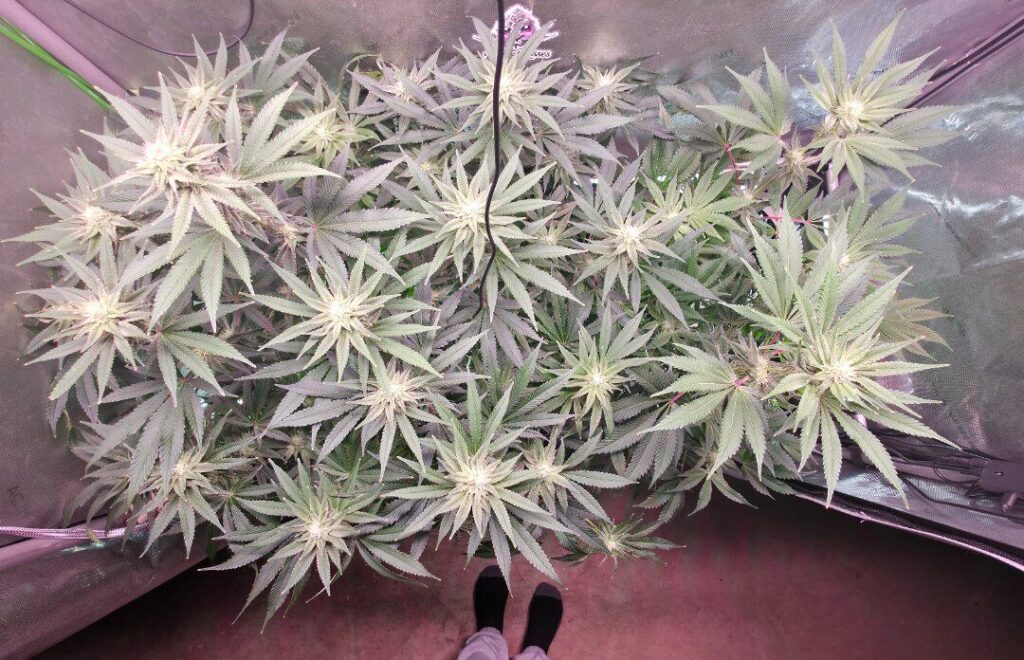
20 Beginner Cannabis Growing Mistakes (and How to Fix Them)

Last updated: November 2, 2026
Quick answer: Most beginner cannabis growing mistakes come from changing too many things at once. Start with stable genetics, a simple setup and one repeatable routine. When something looks wrong, check the plant’s environment and root zone before adding another bottle. These 20 mistakes come from two of my videos, updated where my advice has changed.
Video chapters: beginner mistakes, part 2
- 0:27 — Bag seed and unknown genetics
- 1:32 — Autoflowers and short recovery windows
- 2:37 — Growing several cultivars together
- 3:29 — Trusting “water only” without watching the plant
- 4:25 — Container size and root-room planning
- 5:03 — Waiting too long to start flowering
- 5:46 — Humidity and mold risk
- 6:32 — What “flushing” should and should not mean
- 7:41 — Drying and curing are part of the grow
- 8:27 — Labor, privacy and sharing
Selecting a timestamp opens the video at that moment without moving you away from this section.
20 beginner cannabis growing mistakes—and the better move
1. Starting with mystery genetics
A bag seed can grow into an excellent plant, but you do not know its parentage, growth pattern or sexual stability. That uncertainty makes a first grow harder to read. Start with documented genetics when you want fewer surprises, and use the cultivar-selection scorecard before buying. For documented in-house genetics, Selfie Seeds™ is HWGrow’s seed source.
2. Treating autoflowers as automatic
Autoflowers are not inherently easy or hard; they are simply less forgiving of early setbacks because their vegetative window is short. If germination, transplanting or watering stalls the plant, you cannot extend veg to recover the lost time. Use the autoflower guide to decide whether that tradeoff fits your first run.
3. Running too many cultivars at once
Three cultivars can want three different canopy heights, feed strengths and harvest dates. It is possible, but every difference becomes another variable. A single cultivar—or closely related plants—makes the first cycle easier to learn.
4. Believing “water only” means “stop paying attention”
A well-built living soil can carry a plant for a long time, but no bag can promise the same result in every container, cultivar and environment. Watch growth rate, leaf color, pot weight and root-zone conditions. Let the plant and measurements tell you whether the medium is still carrying the workload.
5. Choosing container size without planning the finish
A tiny pot dries quickly and leaves little buffer; an oversized wet pot can stay saturated around a small root system. Match the container to the plant’s expected size, your medium and how often you can irrigate. The goal is not the biggest pot—it is a root zone you can keep evenly managed.
6. Flipping to flower after the tent is already full
Plants can keep stretching after the light schedule changes, but the amount varies by cultivar and environment. Do not rely on a fixed “indica versus sativa” percentage. Flip when your current canopy still has room to expand, and use training to keep productive tops inside the fixture footprint.
7. Ignoring temperature and humidity together
A humidity number means more when you also know the temperature, canopy density and airflow. Dense flowers in still, humid air carry a different risk than young plants in veg. Use the cannabis temperature and humidity guide, place the sensor near the canopy and check the room with lights on and off.
8. Using “flush” to describe two different jobs
A corrective root-zone flush is for a measured problem such as excess salts or badly drifting input and runoff. Routine preharvest watering is a separate decision. Plain water does not wash stored nutrients out of finished flowers, so do not drown a healthy root zone simply because the calendar says harvest is close. Use the pH, EC, PPM and runoff guide to diagnose the root zone first.
9. Treating harvest as the finish line
A good grow can be ruined by a hot, fast dry or by sealing wet flowers in a jar. Drying removes moisture in a controlled way; curing begins only after the flowers are dry enough to store safely. Follow the drying guide and then the curing workflow. Curing is not decarboxylation.
10. Underestimating the work—or advertising the grow
Growing takes regular checks, cleanup, mixing, training and problem-solving. Build a routine you can maintain before adding more plants. Follow local laws, keep the room secure and be thoughtful about who knows what is in your home.
Watch part 1: the first 10 beginner mistakes
This earlier video covers light, genetics, germination, medium choice, pH, irrigation, diagnosis, sudden changes, harvest timing and privacy. Where the video and this page differ, go with this page.
Video chapters: beginner mistakes, part 1
- 0:25 — Light intensity and coverage
- 1:42 — Starting with stable genetics
- 2:56 — Germination and handling the taproot
- 3:48 — Knowing your medium
- 4:53 — Measuring pH for the medium you use
- 5:52 — Overfeeding and overwatering
- 7:22 — Getting useful troubleshooting help
- 8:38 — Avoiding abrupt changes
- 9:34 — Harvesting too early
- 10:13 — Privacy and security
11. Buying light by wattage or marketing alone
Fixture wattage tells you power draw, not what reaches every leaf. Match the light to the tent footprint, then measure or map the canopy instead of copying somebody else’s hanging height. The LED grow-light guide explains the buying decision, and the light-measurement guide shows how to verify the result.
12. Choosing seeds by a picture or THC number
Flower photos do not tell you stretch, structure, flowering time, stability or how a cultivar behaves in your room. Choose the traits your project actually needs and keep records. Good genetics raise the ceiling; they do not replace good growing.
13. Turning germination into an obstacle course
Do not keep digging up a seed, touching the taproot or changing methods midstream. I compared seven approaches. Choose one and let it work. Use the seven-method germination comparison instead of the peroxide-and-heat shortcut I mention in the video.
14. Treating every medium like soil
Soil, coco and hydroponics do not share the same buffering, irrigation rhythm or pH target. Know what you planted into before copying a feed chart. If the bag does not clearly explain what is in it, save the label and research the product before mixing anything.
Treat any feed chart as a starting reference, not an order. Water quality, what is already in the medium, plant size, cultivar and the room’s demand all change what the plant actually needs.
15. Chasing one pH number
There is no single correct pH for every medium. Calibrate the meter, measure the solution you are actually using and interpret pH alongside EC/PPM and runoff trends. Randomly pouring pH adjuster into the pot is not a diagnosis.
16. Watering by a set percentage
A fixed percentage of container volume is not reliable for every plant or medium. Learn the weight of the pot after a thorough irrigation, let the root zone use that moisture and water the full active root zone again when the plant and medium call for it. The watering guide explains the practical cues.
The most common version of this mistake is loving the plant to death—watering or feeding because you want to help, not because the root zone needs it. Learn the weight of a properly watered container, feel below the surface, water slowly and evenly, and never leave a fabric pot sitting in runoff. Roots need the medium to drain and breathe between waterings.
17. Diagnosing from one leaf
A pale spot is not a complete diagnosis. Note where symptoms started, whether they are moving, how wet the root zone is, recent inputs, pH/EC, light level, temperature, humidity and pests. Use the nutrient-deficiency guide as a pattern library—not a reason to add every nutrient at once.
18. Making several big corrections at once
If you raise the light, change nutrients, transplant and prune on the same day, you will not know what helped or hurt. Correct the most likely cause, keep the rest stable and watch the new growth. Old damaged tissue may never look perfect again.
19. Harvesting because the calendar says so
Breeder timelines are estimates, not a countdown timer. Check the actual flower—not a sugar leaf—with the harvest-readiness and trichome guide. Compare several sites because tops and lowers can finish at different times.
20. Asking for help without the measurements
“What is wrong with my plant?” is almost impossible to answer from one close-up. Include the whole plant, canopy, pot, medium, cultivar, plant age, recent feed and irrigation, pH/EC, light, temperature and humidity. That turns guessing into troubleshooting. You can send that information through Ask HWGrow.
Four light-stress symptoms worth recognizing
The supporting video below is useful because it shows several ways an overly intense or poorly positioned light can appear. The visuals are examples, not a diagnosis by themselves: leaf tacoing, pale specks, dry edges and bleaching can overlap with heat, irrigation, pest and root-zone problems. Measure the canopy and change intensity gradually.
Video chapters: light-stress visual guide
- 0:19 — Four visual patterns
- 0:49 — Tacoing, dryness and upper-leaf yellowing
- 1:23 — Pale specks near the top
- 1:57 — Direct contact with the fixture
- 2:18 — A scuffed or bleached patch
- 2:33 — Height, intensity and diagnosis
- 4:38 — Build an even canopy
Selecting a timestamp opens the video at that moment while preserving your place in the article.
A fast troubleshooting order
- Damage is concentrated at the top: check PPFD, fixture distance, canopy temperature and airflow.
- Yellowing starts at the bottom: inspect root-zone moisture, pH/EC and the nutrition pattern before raising light intensity.
- The plant droops while the pot is still heavy: check irrigation frequency, drainage and root-zone oxygen.
- Spots appear: inspect both leaf surfaces, map where the spots began and rule out pests or splashed solution.
- Several symptoms appeared after one change: reverse or soften that change first instead of starting five new treatments.
Beginner restart checklist
- Write down the cultivar, medium, container size and plant age.
- Record canopy light, temperature and humidity at the same time each day.
- Measure inputs; use runoff only as a trend when it is appropriate for the medium.
- Change one major variable at a time and judge new growth.
- Keep a photo log so you can see whether the problem is actually spreading.
Recommended tools for a simpler first grow
 Replaceable-probe pH meterMeasure and calibrate instead of guessing. Use the range appropriate for your growing medium.View product
 Thermometer and hygrometerTracks the two environmental numbers that make every light, watering and humidity decision easier to interpret.View product
 Illuminated jeweler’s loupeCheck trichomes on the actual flower instead of harvesting by pistils, leaves or the breeder calendar.View product
 Selfie Seeds™ geneticsDocumented in-house genetics for growers who want a more predictable starting point than an unknown bag seed.View product
Affiliate disclosure: HWGrow may earn a commission from qualifying purchases at no additional cost to you. Product destinations can be replaced with equivalent items without changing the growing method.
Next in your grow
Before this step: Cannabis pH, EC, PPM & Runoff: Complete Guide
Next step: When to Flip Cannabis to Flower Indoors
Related: Cannabis Nutrient Deficiencies: Diagnose and Fix Leaf Symptoms · How to Bring Outdoor Plants Indoors Without Bringing Pests
Further reading: Cornell University: hemp nutrient disorder diagnostic guide · Penn State Extension: diagnosing poor plant health
Go deeper (supporter membership required): These advanced guides are for HWGrow supporters: Hydro Masterclass: Root-Zone Health and Root Rot Response · Hydro Masterclass Case Study: Bud Rot Detection and Containment. Become a supporter.
Want the complete workflow?
The public guides explain each decision. The Grow With Me Masterclass organizes those decisions into a complete week-by-week system without copying the protected lessons here. If a plant is already showing symptoms, ask HWGrow a question and include the measurements from the troubleshooting checklist.
Frequently asked questions
What is the most common beginner grow mistake?
Changing too many things without measurements. Record the environment and root-zone data, correct one variable at a time and judge the new growth.
Should a beginner follow a feed chart exactly?
No. A chart is a starting reference. Water quality, what is already in the medium, plant size, cultivar and the room’s demand all change what the plant needs.
How can I get a useful diagnosis for a sick plant?
Share clear photos of the whole plant along with the medium, container size, light and distance, temperature, humidity, feed recipe, input and runoff pH/EC, and anything that changed recently.
How do I know when cannabis is ready to harvest?
Inspect the trichomes on the flowers themselves, not the sugar leaves, and combine that with flower development and the whole-plant timeline. Visible frost alone is not enough.


You may also like
pH vs. PPM for Cannabis: EC Scales, Buffering and Nutrient Lockout