

How to Mount an Inline Fan Outside a Grow Tent

Last updated: August 2026
Quick answer: Mounting an inline fan outside a grow tent can free up valuable headroom. The cleanest space-saving layout is usually carbon filter inside the tent → short duct → inline fan outside → exhaust away from the tent. If both the fan and filter must stay outside, use tent → duct → fan → carbon filter, confirm that your filter supports exhaust-side installation, move its prefilter to the correct side and seal every positive-pressure joint.
This is not an AC Infinity-only, Vivosun-only or Mars Hydro-only trick. The airflow path matters more than the logo. Match the fan, filter and duct diameter, support the equipment securely, and follow the current manuals for the exact models you own.
Outside the tent is not the same as outdoors. The Vivosun and AC Infinity manuals linked below require ducted products to vent outdoors. Follow the exact model’s instructions and local requirements for the final exhaust destination; do not assume that discharging into the surrounding room complies.
Watch: move the inline fan and carbon filter outside the tent
The original HWGrow video shows the compact push-through layout clearly. Two spoken shortcuts need an update: an exhaust fan exchanges stale tent air with room air—it does not create carbon dioxide—and a high exhaust with a low intake remains the normal starting layout even below 78°F. Use the video for the hands-on assembly and the instructions below for the current airflow rules.

Selecting a timestamp opens the standard HWGrow pop-out player at that exact moment without moving you away from this section.
Choose the right outside-the-tent layout
| Layout | Airflow path | Best reason to use it |
|---|---|---|
| Filter inside, fan outside | Filter → duct → fan → outdoor exhaust (per model instructions) | Saves some headroom while the filter still catches debris before it reaches the fan. This is the easiest space-saving compromise. |
| Fan and filter outside | Tent → duct → fan → filter | Maximizes space inside a short tent. The filter must support push-through use, and the prefilter belongs on the incoming-air side specified by its manual. |
| Fan inside, filter outside | Tent → fan → duct → filter | Moves the heavy filter out while keeping a short fan connection inside. Seal the positive-pressure duct carefully. |
Pulling air through the carbon filter is the usual default because the filter captures dust before it reaches the fan and most of the duct stays under negative pressure. Pushing through the filter can still work when the manufacturer documents that configuration, but a leak between the fan and filter can release odor before the air is scrubbed.
How to install an inline fan outside a grow tent
- Unplug everything. Assemble and support the ventilation equipment before connecting power. Keep the controller, plugs and extension connections away from moisture and above the spill line.
- Pick a high exhaust port. Warm, humid air tends to collect near the top of the tent. Use a high port for exhaust and open a lower port for passive intake unless a tested room-specific layout gives you a better result.
- Choose the airflow path. Follow the arrows molded or printed on the fan housing. For the all-outside layout shown in the video, the arrow points away from the tent and toward the carbon filter.
- Place the prefilter correctly. It should protect the carbon from the incoming dirty-air side. In a documented push-through setup, that may mean placing it inside the filter. Do not improvise this change if your filter manual does not support it.
- Connect matching diameters. Use a reducer only when necessary. Every size change, sharp bend and extra foot of duct adds resistance.
- Clamp and seal the joints. Tighten the mechanical connection first, then use ventilation-rated foil HVAC tape on loose metal or duct joints. Cloth duct tape dries out and is a poor long-term air seal.
- Support the equipment. Set an external filter on a stable surface protected from moisture, or use hardware rated above the combined equipment weight. Do not ask the tent fabric or a loose duct sleeve to carry the load.
- Test before adding plants. Run a complete operating cycle, check temperature and humidity at canopy height, listen for rattles and confirm that the tent walls pull inward slightly.

Do not reverse the ports just because the tent is below 78°F
The old video suggests moving exhaust to the bottom when the tent is cooler than 78°F. That temperature-only rule is too simple. A high exhaust and low intake usually create the cleanest path for removing warm, humid air. If the tent is too cool, adjust the fan speed, fixture output, room temperature or controller settings before deliberately trapping warm air and humidity near the ceiling.
The full grow-tent ventilation guide explains intake, exhaust, circulation and fan sizing as one system. The guide to preventing canopy burns can help when you moved the fan outside specifically to gain more height above the plants.
How much fan do you need?
Start with the tent volume: length × width × height. A 2 × 4 × 6-foot tent contains 48 cubic feet. The fan still needs headroom because a carbon filter, duct bends, reducers and a dirty prefilter all reduce real airflow. Match the filter’s practical airflow range to the fan instead of buying by duct diameter alone.
Use the controller to find the lowest speed that keeps temperature and humidity in range while maintaining gentle negative pressure. More suction is not automatically better; severely collapsed walls, noisy air and starved passive intakes mean the system needs more intake area or a lower fan setting.
Quick airflow checks
- Airflow arrow: points along the intended route from the tent toward the final exhaust.
- Lower intake: a tissue held near the opening should move inward while the exhaust runs.
- Negative pressure: the tent walls pull inward slightly, not violently.
- Odor check: inspect and reseal joints before assuming the carbon is exhausted.
- Room-air check: the source room needs replacement air. Recirculating the same hot, humid room air will not solve the tent environment.
- Maintenance: clean or replace the prefilter on schedule and inspect the fan blades and duct for buildup with power disconnected.
Recommended inline-fan installation tools
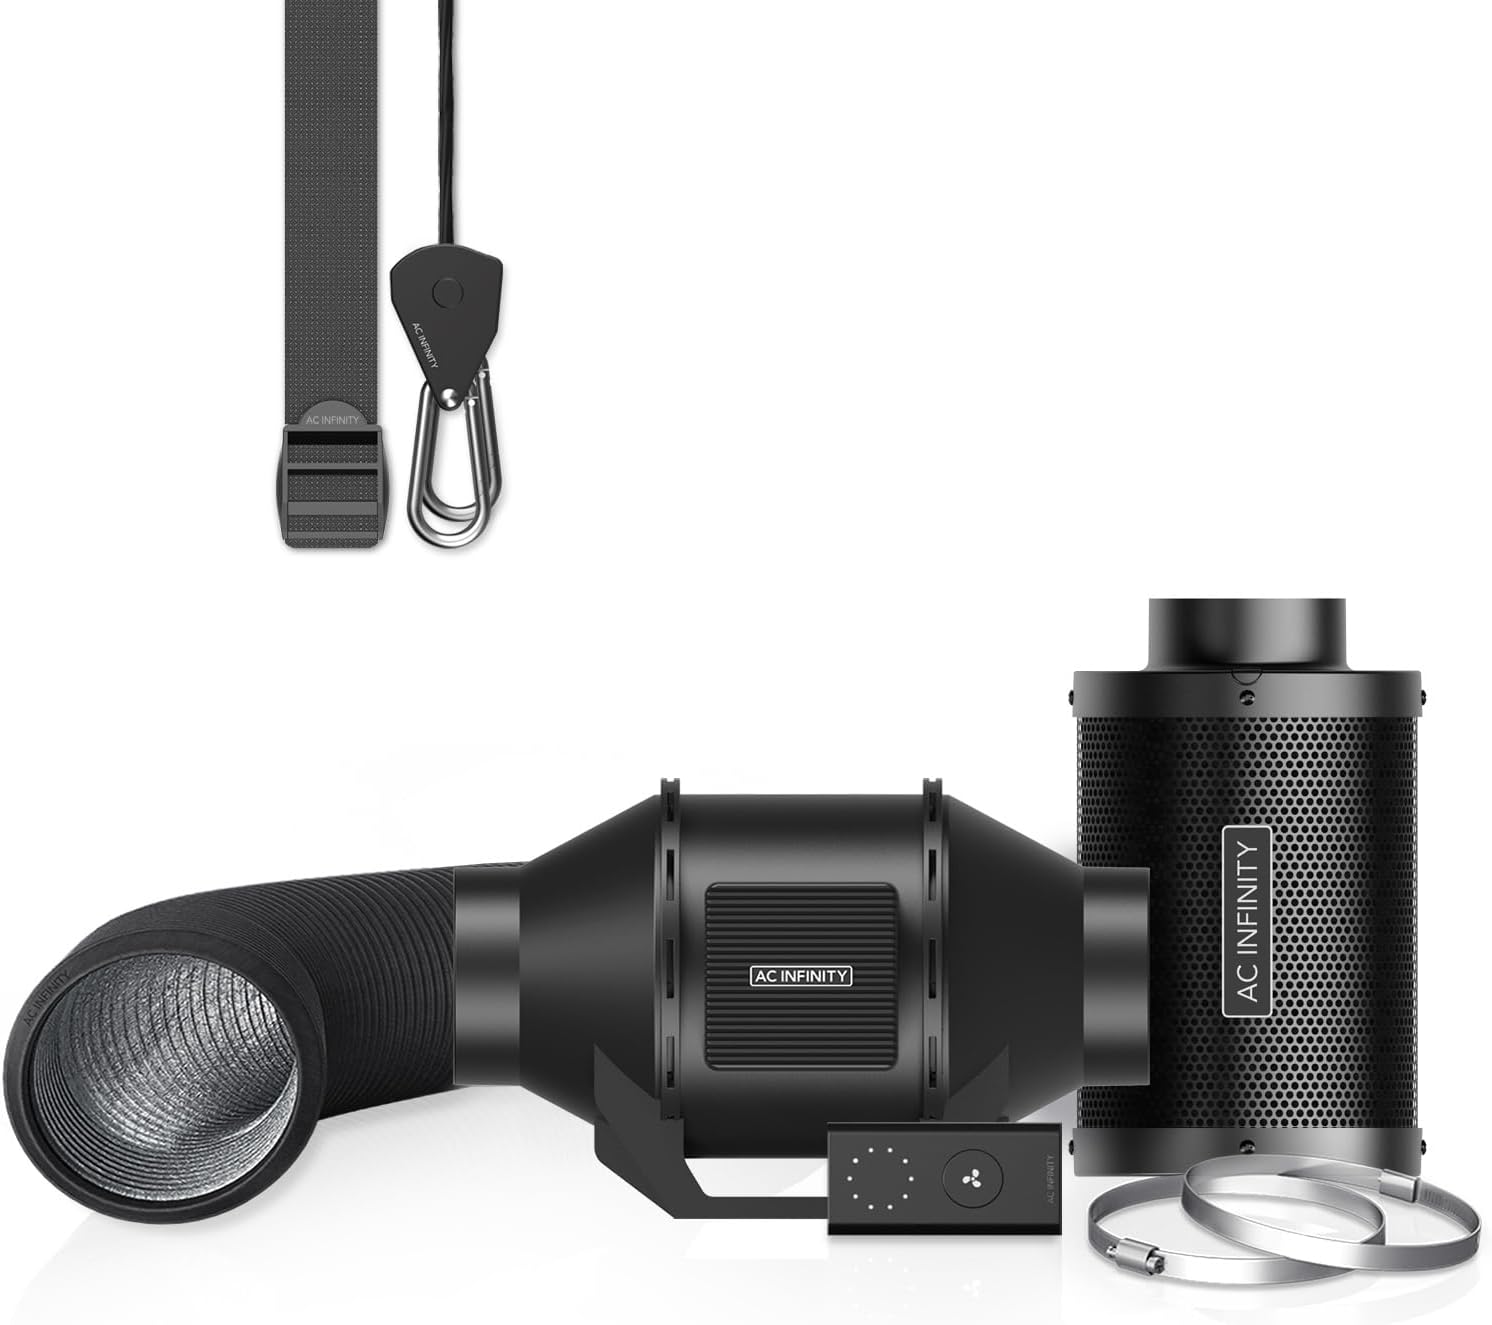 4-inch fan and filter kitA compact category for a smaller tent. Confirm the filter rating, controller features and practical airflow under resistance.View productFoil HVAC tapeUse ventilation-rated foil tape after the clamp is tight to seal loose metal and duct joints.View product
 Rated rope ratchet hangersUseful when the fan or filter is suspended. Verify that the combined rating exceeds the installed weight.View product
 Thermometer and hygrometerCheck canopy conditions independently instead of choosing the exhaust port from one fixed temperature rule.View product
AC Infinity savings: Use code EVYGROWS for additional savings on eligible products. When shopping on Amazon, clip any available coupon first.
Affiliate disclosure: HWGrow may earn a commission from qualifying purchases at no additional cost to you. Equivalent correctly sized fans, filters, hardware and rated sealing products can be substituted without changing the installation method.
Manufacturer installation references
Frequently asked questions
Can an inline fan sit outside a grow tent?
Yes. Keep the airflow arrow pointed away from the tent, support the fan securely, protect its electrical parts from moisture and use a short, sealed duct path.
Can a carbon filter sit outside the tent?
Yes when the filter manufacturer supports exhaust-side or push-through use. Put the prefilter on the incoming-air side specified by the manual and seal every joint before the filter.
Should grow-tent exhaust be at the top or bottom?
Start with exhaust high and intake low so warm, humid air leaves from the ceiling area. Solve a cool tent with fan control and the room’s temperature rather than automatically reversing the airflow path.
Does an inline fan add CO₂ to the tent?
No. It exchanges tent air with the surrounding room. Fresh room air can replenish ambient CO₂ only when the room itself receives replacement air.
Comments
Leave a reply
You may also like
pH vs. PPM for Cannabis: EC Scales, Buffering and Nutrient Lockout
Complete Grow Tent Setup: Four Videos, One Working Setup




Featured Grow

Mine wasnt that bad, i am low rate afib so just swing between 95 and high as 150 sometimes, up…

Yeah not fun, but as long as it helps thats what matters. Had my heartrate 200+bpm in the hospital for…
Tupac mine is for afib. Just Had cardio version the other week to get me out of it, worst case…
I was hoping for one at least that check the box's, but ya, having a couple is that much better.…
Heart cath ablation? Had one of those for Super Ventricular Tachycardia and it worked well
Hey I put my exhaust at the bottom and opened a vent at the top but will this cause light leaks or pest for my tent ?