


How to Grow Weed at Home: The Complete 2026/2027 Step-by-Step Guide (Seed to Harvest)

Last updated: (2026/2027 edition)
Quick answer: Where it’s legal, you can grow weed at home in about 4 months. Germinate a feminized photoperiod seed in premoistened soil, veg for 6 weeks under 18 hours of light, then switch to 12 hours and flower for 8 to 11 weeks. Feed with General Hydroponics Flora Trio plus CalMag, pH your water to 6.2 to 6.5, and harvest when most trichomes are milky with a few amber. Then dry and cure the buds.
Want this on your phone while you grow? Use the interactive HWGROW grow cheat sheet for every week’s settings and how-to videos, and the feed calculator for exact ml per plant.
Is it legal to grow weed at home?
It depends on where you live, so check before you buy anything. Home cultivation is legal in some US states and countries, restricted in others, and still a crime in many places. Federal law in the US still treats cannabis as illegal, even where states allow it.
Before you start, confirm three things for your location:
- Age: most places that allow home growing require you to be 21 or older (18 for medical patients in some places).
- Plant limits: many states cap the number of plants per adult or per household, and some count only mature plants.
- Conditions: rules may require the plants to be out of public view, locked, or indoors, and some states require a medical card.
This guide is for adults growing where it is legal. Laws change, so read your state’s current statute or official cannabis agency page. See which US states allow home growing.
What equipment you need (and what to buy first)
A grow tent with a good LED light gives you the most control and the best quality. You can grow without one, but light, temperature and humidity will swing and your results will too. If your budget is limited, spend in this order: grow light, then genetics, then everything else.
For full setups by plant count, watts and fans, see the tent configuration guide. Everything else is listed in everything used in this tutorial. Picking a light? Read how to pick an LED grow light.
| Item | What to look for | Notes |
|---|---|---|
| Grow tent | An oversized 2×4 is what I recommend (a 3×3 wastes space and doesn’t fit the light’s footprint well) | Tall enough to leave room for plant height plus about 10 inches under the light |
| LED grow light | Full spectrum, continuous dimmer, 2-year warranty | About 30 watts of LED per square foot of grow space; the tent configuration guide lists the wattage for each layout |
| Timer or smart plug | Switches lights on a schedule | Sets 18 hours in veg, 12 in bloom |
| Inline fan and oscillating fan | Move and exchange air | You want indirect airflow. The goal is just enough wind to make the leaves gently vibrate, and don’t aim fans at the plants until week 5 |
| Thermometer / hygrometer | Reads temperature and humidity | Place at canopy height |
| Humidifier | Opaque (black) reservoir, warm and cool mist, built-in humidistat | A clear tank grows algae |
| Fabric pots | 5 gallon works for most grows | Add a 1 to 2 inch layer of perlite at the bottom, which helps prevent overwatering |
| pH meter and pH Up/Down | Calibrated meter | Dilute the adjusters before use |
| Watering can | Wide-dispersing spout | Disperses water widely and gently, so you can avoid the main stem |
| PAR / PPFD meter (optional) | Measures light intensity | Helps you set the dimmer |
Choosing a light. Look at the diodes (Samsung diodes were discontinued at the end of 2025, and Bridgelux currently seems to be dominant), a continuous dimmer, a warranty of at least two years, and how much heat it gives off. Heat matters most if you grow through hot summers. Then check non-sponsored grow journals to see real harvests from the light you’re considering. When you have a choice between a bar light and a panel, go with a bar light: the corners of the tent often get little or no light under a panel.
Keep it simple and save money. Used equipment from local marketplaces can cut costs a lot, though you usually lose the warranty. Try to avoid bringing lights closer than 16 inches to the canopy, since intensity rises sharply as you get closer.
Some links on this site are affiliate links. They cost you nothing extra, and I only recommend gear I’d use myself. See tent configurations by plant count, watts and fans.
Which seeds to grow: feminized photoperiod
For your first grow, buy feminized photoperiod seeds. They almost always produce female plants, which are the ones that make buds, and you control when they flower by changing the light schedule.
- Feminized photoperiod: “photo” means light and “period” means time. The plant stays in vegetative growth under about 18 hours of light and starts flowering when you switch to 12. You decide how big it gets.
- Autoflowers: these flower on their own clock, regardless of light. They are not easier. I have witnessed too many first-time growers end up with small plants and low yields, so I advise against them. If you do run autos, hydro or coco is the recommended medium for large plants (see Maximizing Autoflowers).
- Regular seeds: about half become males, which make pollen instead of buds. You’d have to sex every plant and remove the males.
How to pick a strain and breeder. Note both the strain name and the breeder, because the same strain name from a different breeder is often completely different genetics. Look for strains that experienced growers have run more than once, and check grow journals. Don’t rely on the top search results alone, since companies that are good at SEO don’t always have the best genetics.
A note on hermaphrodites. Occasionally a female plant grows male flowers (“nanners”). Stress can contribute, but unstable genetics are a major cause, which is why feminized seeds from a breeder who stress-tests their lines are worth paying for.
Disclosure: I breed Selfie Seeds™, and most of the genetics I’ve grown out and wanted to run again are available there. You don’t have to buy from me. Any reputable feminized photoperiod seed will work with this guide.
Soil and nutrients
The feed schedule in this guide is built for Happy Frog soil and the General Hydroponics Flora Trio (Micro, Grow, Bloom) plus CaliMagic. That is all you need. I have tested every style of growing, and synthetic nutrients work better. It is like taking medicine intravenously instead of through a time-released pill: it is immediate and direct, and it does not have to be broken down first the way organic top dresses do. Research on organic versus conventional food, summarized by the Harvard Gazette, finds no clear safety or nutrition advantage for organic. The NPK ratios in this feed schedule are based on published cannabis NPK research and then tweaked over hundreds of my own grows and user feedback. How to mix them and when to water is covered in the 7 rules of feeding and watering, right after germination.
Soil
Happy Frog is a biologically active potting soil, and it’s what the feed schedule was tested on at about 78°F. Bags vary, though. Lab and slurry tests I ran showed a wide pH range, and some bags arrive with fungus gnats. A good alternative is ProMix HP (HP stands for high porosity). ProMix has fewer nutrients and less biodiversity than Happy Frog, so feed it with the week 3 amounts from week 1 (see the ProMix HP lab test). In my experience and from user feedback, ProMix HP‘s pH has consistently been in range.
Slurry test your soil. Mix soil and water 1 to 1, let it sit overnight, then measure pH. Happy Frog tested at 5.2 in a lab and 4.9 in my home slurry test. A comfortable range is 5.8 to 6.5, so adjust before planting if you read well outside it. This is why I recommend pH balancing Happy Frog before you plant: bags vary a lot, and a bag this acidic can keep plants from taking up nutrients properly. See the full results in the Happy Frog lab test.
Premoisten the soil. Wet it until saturated (you shouldn’t be able to squeeze water out), mix it by hand and fill the pot without pressing it down. Let it sit for about five days so the microbes wake up. This is why a seedling in premoistened soil needs no scheduled watering for its first six days or so.
Full written steps: how to prepare your pots and test your soil.
How to germinate cannabis seeds
Germination takes about 4 days on average. When the seedling breaches the soil surface, that is day 1 of the week-by-week schedule. All germination methods I tested in a side-by-side of seven worked; rapid rooters finished first, and paper towel, direct soil, rockwool, coco plugs, cup of water and alfalfa-sprout style all sprouted. This guide uses the simple direct-in-soil method.
- Wipe the seed. Dab it with a paper towel dampened with 3% hydrogen peroxide for about 30 seconds. This kills any mold spores on the seed.
- Plant it 1 inch deep. Place it in a small hole, pointed end down (the flat, dimpled end on the opposite side faces up), and cover it lightly.
- Cover with a clear cup. This acts as a dome and holds humidity near 80%.
- Light on 24 hours at 250 PPFD (about 30% intensity on the dimmer, with the light about 20 inches above the pot). Seal the tent and leave the fans off until the seedling emerges.
- Wait for day 4. When the seedling breaches the soil (day 1 of the week-by-week schedule), poke three pencil-sized holes in the cup, drop the light to 18 hours on and 6 off, and follow the week-by-week schedule. Widen the holes whenever you see drops form on the cup.
Check your temperature. This guide was tested with soil at about 78°F. At 30% intensity a sealed tent has not overheated for me, but every light and tent differs, so put a thermometer at pot level on day one.
Advanced mode: rapid rooters. This method sterilizes the rooters first, because seeds can carry fungal spores, mold or bacteria. Submerge them in water with about 2 ml of hydrogen peroxide (optional nutrients up to 150 ppm), squeeze out the bubbles, then squeeze again so each weighs about 25 grams. Seat the seed with the dimpled end facing up, keep it warm (about 85°F) under roughly 200 PPFD, and wait at least 3 days. Move it into the soil once the root shows at the bottom of the rooter.
Read germinating with rapid rooters for the full write-up.
The 7 rules of feeding and watering
- Remove chlorine. Let tap water sit overnight in an open container. For faster results, add about 2 drops of 3% hydrogen peroxide per gallon, which reacts with free chlorine. Chloramine does not leave water by standing; check your water report, and use a carbon filter or a chloramine neutralizer if it's present. Read the full chlorine and chloramine article. Check whether your local water has chloramine with the chloramine checker.
- Water when the lights turn on. Plants drink most then, and wet soil through the dark hours can waterlog roots, the main cause of overwatering.
- Match water to plant size. Because the soil was premoistened and the seedling is tiny, the first watering comes around day 7. Amounts then grow each week (see Week by week).
- Water slowly. Use a watering can, avoid the main stem and take rounds between plants so pools don't form.
- Mix nutrients in order. Add them left to right (CalMag, Micro, Grow, Bloom), in ml per gallon, and mix each in thoroughly before adding the next. Never combine the concentrates directly.
- pH last. After the nutrients are mixed, test with a calibrated meter, then add tiny amounts of diluted pH Up or Down, stir, wait and retest. Always dilute the adjusters first.
- Don't overwater early. For the first four weeks, poke a finger an inch into the soil and feed only if the tip is dry. Once the plant is bigger than the pot, water until you see the first drip from the bottom.
Always use pH Up and Down and nutrient concentrates as directed on the label. They are corrosive.
Need exact ml for your plant count? Use the feed calculator.
Vegetative stage: weeks 1 to 6
Veg is where you build the plant. Run 18 hours of light on and 6 off, raise the light intensity and feed a little more each week.
Nutrient numbers are ml per gallon of feed water, added left to right (CalMag, Micro, Grow, Bloom), then pH last. Fan numbers are the speed settings on both fans. Schedule v26.a from the HWGROW cheat sheet, based on Happy Frog soil at about 78°F with 18 hours of light in veg. For exact ml for your plant count, use the feed calculator.
Week by week
- Week 1: plain water only (no nutrients, no CalMag, no pH adjusting): 1 cup when an inch down is dry. Light 250 PPFD (30% at 20 in), humidity 80% under the dome, fan 1. Keep the dome on and widen the holes each time you see drops form. With ProMix HP, use the week 3 feed instead.
- Week 2: plain water only: 2 to 3 cups every 4 to 6 days. Light 275 PPFD (30% at 20 in), humidity 80% under the dome, fan 1.
- Week 3: remove the dome once the leaves start touching its sides, then start the first feed: CalMag 1, Micro 2, Grow 1, Bloom 1 ml per gallon, pH 6.3. Water 4 to 6 cups every 6 to 8 days. Light 300 PPFD (40% at 20 in), humidity about 70%, fan 2.
- Week 4: start topping (see How to top below). Feed CalMag 1, Micro 4, Grow 1, Bloom 2 ml per gallon, pH 6.3. Water 4 to 6 cups every 6 to 8 days. Light 350 PPFD (40% at 20 in), humidity about 70%, fan 3.
How to top (start in week 4)
Cut or pinch the main stem above a node so the plant grows several main tops instead of one. Top at the 4th node, ideally when the lights come on, and wait for strong growth before each next round. See the full topping and canopy formula guide.
How many times to top. Each finished top needs about 4 square inches of canopy. Multiply tent width by length in inches, divide by 4 for the total number of tops, then divide by your plant count and round down to a power of two. Every complete round of topping doubles the tops: 1 round gives 2, 2 rounds give 4, 3 rounds give 8 and 4 rounds give 16. Let the topping calculator do the math.
Weeks 5 and on
- Week 5: you can now angle fans so the air moves indirectly across the plants, just enough to make the leaves gently vibrate (fan 4). Feed CalMag 1, Micro 5, Grow 1, Bloom 3 ml per gallon, pH 6.3. Water 6 to 9 cups every 3 to 5 days. Light 400 PPFD (40%, moving to 50% at 22 in), humidity about 60%.
- Week 6 and on: extend this week until the plant reaches the size you want. Feed CalMag 1, Micro 6, Grow 1, Bloom 3 ml per gallon, pH 6.4. Water until you see the first drip from the bottom. Light 500 PPFD (50% at 22 in), humidity about 60%, fan 4.
Drip irrigation is optional and advanced. Most first grows are better off hand watering slowly as above. Do NOT set this up unless the plant is bigger than the pot, which averages around week 5, so realistically from week 6. Once it is, a pump, drip kit and a smart plug on a timer can feed automatically. Set it to run shortly after the lights come on, test it by hand first, and keep the water level below the drip line so nothing siphons. More: DIY drip irrigation setup.
Before the flip. Two days before you switch to 12 hours, defoliate the bottom half of the plant and feed right after. Remove leaves that are dying, shaded or facing into the plant, and don't pull more than you can justify. The next section covers the flip.
Read 10 practical defoliation tips.
When to flip to flower
The flip is the day you cut the light from 18 hours to 12. Flip by space, not by the calendar. Photoperiod plants roughly double in height after the flip, so flip when the plant is about half the height you want at the end.
More: when to flip cannabis to flower.
The flip formula. Measure from the top of the soil to the tent ceiling, subtract 10 inches for the light and its clearance, then divide by 2.
Flip height = (tent height from soil − 10 in) ÷ 2
Example: a 64 inch tent gives 64 − 10 = 54, and 54 ÷ 2 = 27 inches. Flip when the plant reaches about 27 inches, and set the timer to 12 hours on, 12 off. Stretch varies by strain, so adjust the divisor on your next run if your plants stretch more or less.
Bloom stage: weeks 1 to 8+
Bloom runs 8 to 11 weeks in total. Light stays at 12 hours on and 12 off the whole time. Settings change through week 4 and then hold, with only the light and water adjustments listed, until the trichomes are ready (see harvest below). Nutrient numbers are ml per gallon of feed water, added left to right (CalMag, Micro, Grow, Bloom), then pH last. Use the feed calculator for exact ml.
What to do each week
- Week 1 (week 7 overall): support or trellis the plant as it stretches. Feed CalMag 1, Micro 5, Grow 2, Bloom 5 ml per gallon, pH 6.4. Water 11 to 14 cups every 4 to 5 days. Light 600 PPFD (70% at 20 in), humidity about 55%, fan 5.
- Week 2: check for sex. Males show small ball clusters at the branch joints, usually 3 to 5 days after the flip; females show white pistils. Remove any male immediately unless you plan to breed, and check carefully for hermaphrodites (balls mixed in with the pistils, or banana-like growths); see what balls, nanners and herms look like. This is also a good time to take clones of any female you want to keep. Feed CalMag 1, Micro 4, Grow 3, Bloom 6 ml per gallon, pH 6.5. Water 11 to 14 cups every 4 to 5 days. Light 700 PPFD (70% at 20 in), humidity about 55%, fan 6.
- Week 3: feed CalMag 1, Micro 4, Grow 4, Bloom 7 ml per gallon, pH 6.5. Water 12 to 16 cups every 3 to 4 days. Light 750 PPFD (80% at 18 in), humidity about 50%, fan 7.
- Weeks 4 and 5: feed CalMag 1, Micro 4, Grow 3, Bloom 9 ml per gallon, pH 6.4. Water 12 to 16 cups every 3 to 4 days. Light 800 PPFD (80% at 18 in), humidity about 45%, fan 8.
- Weeks 6 to 8: same feed (CalMag 1, Micro 4, Grow 3, Bloom 9 ml per gallon, pH 6.4). Water 13 to 17 cups every 3 to 4 days. Light 800 PPFD (90% at 18 in), humidity about 45%, fan 8.
- Week 9 to chop: same feed. Water about 9 cups every other day and pull the light back to about 80% at 20 in. Week 9 is when the buds look their prettiest, so take your photos then.
- No-nitrogen mix: only if the leaves are still very dark green in bloom week 5 or later (see the troubleshooting section). Same feed with Flora Micro at 0: CalMag 1, Micro 0, Grow 3, Bloom 9 ml per gallon, pH 6.4.
How to read your leaves: nutrient burn and deficiencies
Deficiencies will rarely apply if you follow the feed schedule. Most of the time they show up because the grower did not trust the system and added something extra, which locked out another nutrient or threw off the ratios. Before adding anything, check the basics: pH of your water and runoff, how much you're watering, and your water source (chloramine can cause spotting and decline that no supplement fixes). Then match what you see. For photos and fixes of every deficiency, watch the deficiency masterclass.
| What you see | Likely cause | What to do |
|---|---|---|
| Neon-green or glowing tips on top leaves, from about week 5 of veg | Too many nutrients | Feed plain water (a flush) on the next feeding |
| Only the bottom leaves are yellow | Not enough nitrogen | Add 2 ml of Flora Micro per gallon to the feed |
| Lower leaves yellow first, upper leaves stay greener | Nitrogen deficiency (nitrogen is mobile, so the plant moves it upward) | Raise Flora Micro as above |
| Rust-colored spots or damage on new growth | Calcium deficiency (calcium is immobile) | CalMag, but don't overdo it, since excess can lock out potassium |
| Yellow stripes between veins that later turn brown | Magnesium deficiency | A small pinch of Epsom salt (magnesium sulfate) |
| Yellow or brown edges only, centers stay green | Potassium deficiency | Check pH first, then a potassium source |
| Dark, dirty-looking patches, later dry and curling leaves | Phosphorus deficiency, usually late | A higher-phosphorus nutrient |
| Entire plant looks lime green | Possible sulfur deficiency | Epsom salt in a tiny amount |
| Leaves stay dark green in bloom week 5 or later | Too much nitrogen | Use the no-nitrogen mix listed in the bloom weeks above |
Why green leaves at the end matter. A natural fade (senescence) late in bloom is normal. Very green leaves at chop usually mean the plant had too much nitrogen. In my experience excess nitrogen makes for harsher smoke that takes longer to cure, which is why Flora Micro is lowered in bloom.
Fix problems gradually. Change one thing at a time and give the plant a few days. Damaged leaves, especially browned tips, will not heal, so judge by the new growth.
In a study I walked through in a video, iron and manganese deficiencies showed no meaningful difference from the control, because Flora Micro and most standard nutrients already contain enough of them.
When to harvest: reading trichomes
Harvest by trichome color, not by the calendar. Trichomes are the tiny glassy mushroom-shaped glands on the buds, and their heads change color as the plant matures. You need a magnification tool to see them: a jeweler's loupe (about $10) or the macro camera on a modern phone.
Read when to harvest: trichome color and readiness guide.
| Trichome color | What it means |
|---|---|
| Clear | Immature. Typically seen in the first weeks of bloom. Harvesting now means low potency. |
| Milky or cloudy | Peak THC for most growers. Typically around bloom week 8 or 9 for an all-milky harvest. |
| Amber | THC is degrading toward CBN. Many growers wait for a few amber heads before chopping, and some wait longer (around week 10) for a more sedating effect. |
Individual strains vary, so use these weeks as a guide.
How to inspect. Don't judge by the top bud alone. Check three buds from about one third of the way down the plant, because buds closest to the light mature first. Ignore fan leaves and sugar leaves, which brown early. When most heads on those buds are milky, with the first small specks of amber, it's time.
Staggered harvest. If the tops are ready before the lower buds, chop the top, wait about four days, then take the middle, then wait about a week and take the bottom. If you chop everything at once, use the one-third-down rule.
See how to prevent larf and popcorn buds.
Just before chop. Pull the light back to about 80% at 20 inches during the final weeks. Chop in the morning, right before the lights would normally come on and before you would feed, so the plant holds less water.
How to dry, trim and cure
Freshly cut buds are about 75% water by weight. Drying brings that down to roughly 10 to 15% and lets chlorophyll break down, which removes the hay and grass smell. Good drying and curing protect the aroma and potency you grew.
Dry (3 to 14 days)
- Pick a dark room near 60°F and 55% humidity. Light degrades THC. Small swings are fine, but stay within about 10 degrees of these targets and avoid big fluctuations. Use a heater, AC, humidifier or dehumidifier if needed.
- Chop and hang. Remove large fan leaves and any yellowing leaves, which lowers the risk of mold. If the plant collapses once the supports come off, cut it by branch.
- Space the buds out. Nothing should touch. A small fan on low can help, aimed at a wall at an angle, never at the buds.
- Watch the smell. Days 1 to 2 smell like pungent bud. Around days 3 to 5 you'll notice a hay-like smell as chlorophyll breaks down. That is normal.
- Check the stem snap from about day 5. Bend a stem as thick as a toothpick. If it bends, wait another day. If it cracks, the buds are ready to trim and jar.
A more precise method is weight: I wait until about 70% of the original weight has evaporated, and 72% has been my sweet spot over several years of tracking.
Why not dry fast? Low humidity dries buds too quickly and can trap chlorophyll in the center. High humidity risks mold and bud rot.
Trim
There is no single right way. Wet trimming (before drying) works for dense, leafy buds, because removing leaves helps them dry evenly and fast. Dry trimming (after drying) suits slim buds with few leaves. You can also do a light wet trim and a detailed dry trim.
- Plan on about 1 to 2 hours per ounce of bud.
- Work on a clean surface with gloves, clean trimming scissors, rubbing alcohol and paper towels.
- First buck the branch into individual bud sites, leaving a small stem as a handle.
- Trim sugar leaves close to the bud, and remove burnt tips and leaf material with little trichome coverage.
- A trim tray lets loose trichomes (kief) fall through for you to collect.
Cure
Curing is slow, controlled drying in sealed containers. Put trimmed, dry buds in jars and open them regularly at first to let moisture and gases out (called burping). I target about 62% humidity in the container and keep curing until the humidity stabilizes. That, not a set number of days, is your signal.
If you cure a lot, a large plastic tub with a humidity controller and a small dehumidifier can replace burping jars: set the controller about 2% under your target to allow for lag, and roll the jars every week or so. The process takes time, and in my tub it took a little over two months for humidity to hold within about a four-point range. Excess nitrogen in the plant also extends cure time, so a clean feed pays off here. The tub must be completely sealed, so you may need to make a hole and seal it with some tape. Full instructions: how to cure weed.
Frequently asked questions
How long does it take to grow weed at home?
About 4 months from seed to harvest: roughly 4 days to germinate, 6 weeks of veg and 8 to 11 weeks of bloom, which is 14 to 17 weeks from sprout to chop. Drying and curing add several more weeks.
Is growing weed at home easy for beginners?
Yes, if you control the environment and keep the process simple: one feminized photoperiod seed, a tent, an LED light, soil and a feed schedule. Most beginner problems come from overwatering, wrong pH or poor genetics.
How much does it cost to start growing?
Plan on approximately $600 for your first plant and about $100 for each plant after that. The light is the biggest expense. If your budget is tight, spend on the light first, then genetics, then everything else. Used tents and fans can cut the cost.
What is the best way to start seeds?
All seven methods I compared worked, and rapid rooters sprouted first. Direct sowing in premoistened soil is the simplest and is what the feed schedule assumes.
Should beginners grow autoflowers?
I recommend feminized photoperiod seeds. I have witnessed too many first-time growers end up with small plants and low yields from autoflowers, so I advise against them. If you do run autos, hydro or coco is the recommended medium for large plants (see Maximizing Autoflowers). Photoperiod plants let you decide when to flip.
What soil is best for growing weed?
The feeds in this guide are written for Happy Frog, adjusted for its starting pH. ProMix HP is a good alternative, but it lacks the biodiversity Happy Frog provides and has fewer nutrients. Test the pH with a slurry test before planting.
What nutrients do I need?
General Hydroponics Flora Micro, Grow and Bloom, plus CaliMagic. Follow the week-by-week feeds in ml per gallon.
What pH should my water be?
About 6.2 to 6.5 in this guide. Adjust only after mixing the nutrients, with a calibrated meter and diluted pH Up or Down.
Can I use tap water?
Usually, after letting it sit overnight to release chlorine. If your water report lists chloramine, standing won't remove it, so use a carbon filter or chloramine neutralizer.
When should I top my plant?
Week 4 of veg, at the 4th node, ideally when the lights come on. Wait for strong growth between rounds.
When do I switch to 12/12?
When your plant reaches your target height. Use the formula in the flip section.
How do I know if my plant is male or female?
You can't tell until the pre-flower stage, and the first reliable female sign is white pistils at the nodes. Males show clusters of balls. Remove males before they release pollen.
How do I know when to harvest?
Check trichomes with a loupe. Most heads should be milky, with a few amber specks.
How long should I dry and cure buds?
Drying takes about 3 to 14 days depending on bud size and conditions. Cure after that in sealed jars, with humidity around 62%, until the humidity stabilizes.
How many plants can I grow?
Check your local limit first, then size the tent. As a rule of thumb, allow about 4 square feet of canopy per full-size plant.
Go deeper
- Seeds: Seven germination methods compared · Germinate in rapid rooters
- Setup: Tent configurations · How to pick an LED · Measure light intensity · Install a large LED · Best tent humidifier
- Soil and water: Happy Frog lab test · Soil preparation · Slurry test · Chlorine and chloramine
- Plant care: Top or FIM · When to flip · Defoliation tips · Drip irrigation · Cloning · Identify a male
- Troubleshooting: Nutrient burn and flush · Nutrient deficiencies
- Harvest and cure: Trichomes with a loupe · When to harvest · Dry · Trim · Cure tub
Follow along with the interactive cheat sheet.
Keep learning with HWGrow
This guide covers the full grow in one page. If you want to go further, there are two ways to learn alongside me.
- Grow with Me Masterclass: follow a real grow day by day, from seed to harvest, with the exact settings and decisions behind this guide.
- Breeding Masterclass: learn how to make your own seeds and strains, from picking parents to pheno hunting.
Prefer to just say thanks? This guide is free because of supporters. You can buy me a cup of coffee or support HWGrow directly. Both go straight into more tested, free tutorials.
Comments
Leave a reply





Featured Grow
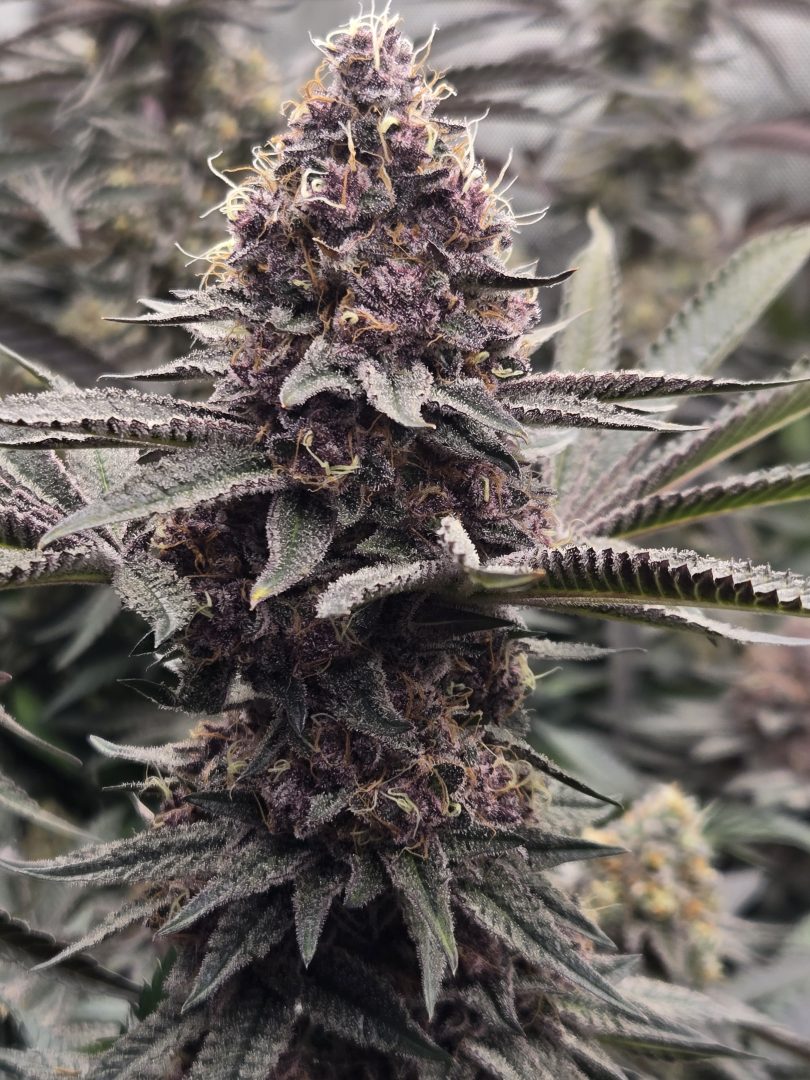

Mine wasnt that bad, i am low rate afib so just swing between 95 and high as 150 sometimes, up…

Yeah not fun, but as long as it helps thats what matters. Had my heartrate 200+bpm in the hospital for…
Tupac mine is for afib. Just Had cardio version the other week to get me out of it, worst case…
I was hoping for one at least that check the box's, but ya, having a couple is that much better.…
Heart cath ablation? Had one of those for Super Ventricular Tachycardia and it worked well
Hi brother
I’m inquiring about flushing my autoflowers.Do I feed them nutrients on the 3rd feeding and flush or flush at the 3rd feeding only?
Just flush, no nutrients at all. It is imperative because salts will build up and cause lockout. This gives them a break and also helps break down any salts that may have built up.
October 5, 2026 editorial note: This historical reply is superseded by the dated guidance in the current article above. The original reply is preserved here for context.
Join the discord for an updated feed chart 😉
I’ve decided to go the hydroponic/Ebb/Flow method. Can I use the same nutrient chart for autoflowers?
No you can’t, big bloom is not water soluble and will clog pumps. Not sure if that applies to ebb and flow. I would use the general hydroponics trio instead but with different amounts. Working on a hydroponics guide but you could message me on discord if you want a detailed explanation in what I’m doing now.
Thank you very much for reaching out. I ordered the general hydroponic trio. I’m wondering if I can still use your chart, with the same ml/feeding schedule?
No. Hydroponics is playing chemist. Hit me up on discord (scroll down). I’ll walk you through the whole process. I’ll warn you that a lot of what sites are recommending is wrong.
How do I find tha discord
scroll down and click it
I downloaded the (Discordapp) it’s asking me for your username and tag#. I’m using the aircube ebb/flow system with the clay pebbles as my medium. I have the latest Mars Hydro Tsw 2000 grow tent with the 300 w full spectrum led.
ShaneF#3971 is my Discord contact. Thank you for helping brother. There aren’t many good people left. Let’s stand together.
how much water do you use when putting in the nutrients? 1 gallon? im new to growing and have some questions, if you can add me my discord is soap#9341
Depends, all those measurements are per gallon but the amount of water you feed depends on size of pot and plant. Good rule of thumb is to use a fifth of the volume of the soil you have and wait for it to dry up to refeed
Really appreciate the cheat sheet (made a HUGE difference; literally doubled my last yield) but I think I’m getting Week 7’s instructions wrong. Am I supposed to use only regular water (no nutes) for the entire week, give the plants regular water every other day, or something else? Thanks!
Your basically just feeding it a heavy plain watering. Watch this video, it shows the best way of feeding and dunking. https://www.howweedgrow.com/overwatering-underwatering-fabric-pots/. The intention is to flood it and strip all the nutes remaining in the soil and restart with a slightly higher P and K
Your chart says to NOT used nutrients until week 3 for autos in promix. Is this a typographical error?
No it is not an error. The seeds have everything the plant needs in terms of nutrition for the first two weeks
hello is all of this still good information for late 2023??💜💜
Yes
Used your chart for my first grow. Monster plants with monster yields with no health issues. Thanks man. Really appreciate all you do. But I logged in a few days ago because I’m starting my 2nd grow and I can’t find the fox farm trio chart. Did it get moved?
Hey Brian, Man, you need to share the results!!!
Anyhow, I started advising the use of General Hydroponics over FF trio simply because of the results, so I removed it, but here’s the old file back, https://www.howweedgrow.com/fftriochart.pdf
Sweeet. Thanks man!
Yeah my first grow blew me away. Bought a few packs of seeds and went for it with your FF chart. It’s drying now. Then last week my local growmie gave me some clones so I’m going to finish the FF I have left on those for my 2nd grow. But now I’m interested in your GH chart. looking forward to experimenting with it next round.
I’m having a blast. Thanks again for all your content. If I can figure out discord, I’ll share some photos.
If you transfer a clone (week 3ish) into your final pot (3-5 gallons), do you still water until runoff at the bottom or should you use less water?
I would premoisten the new soil with a fifth of water to volume of soil. The watering is still first sight of runoff but check the video on testing runoff, the issue with fabric pots is sometimes the bottom fabric clogs and traps water so you also want to angle drain to remove water that may drown your roots. That’s the safest method.
How can I get everything that I just read cause I’m needing help with my grow?
What do you mean? The chart is linked in the description, clicking the picture of the chart will let you download it
I’d like to grow again. I did grow with greae success before moving.
I live in a perfect place for outside growing but don’t have seeds, can you point me to a company that can supply me with blue dream seeds,
I have all the equipment to grow inside as well, 2 seperate rooms, lights etc.
Any help finfing seeds, starts etc would be very helpful.
Thank you.
Blue dream is one of the best. GROW DIARIES is a great site to see what amateur growers have done with actual strains and I narrowed it down to 2 journals and you could see which breeders the seeds came from there:
https://growdiaries.com/diaries/132196-grow-journal-by-tektonik80
https://growdiaries.com/diaries/101911-grow-journal-by-shadokinveil
You could see other journals, but I would highly recommend photoperiods:
https://growdiaries.com/explore?q%5B%5D=blue&q%5B%5D=dream&tags=harvested,photoperiod
great is the suggestions though finest ever moves to care of the whole plant indeed it is the best to be done keep up the best job.
I starting putting together my RDWC a few months ago. My seeds are just sprouting. I have watched many of your videos multiple times. You make it very easy to understand how to grow in this medium. Following your chart i assume i will have a successful first grow!! Im also about to join your patreon if not for all the support to at least put a couple dollars in your pocket. The work you have done is amazing and you dont charge anything for it when you easily could!! Thanks for the help! La-da-da-da-dah you did teach me!!😁😁
Appreciate it, best of luck on your first grow. It’s addicting
Im starting with a inert medium. 50% perlite 50% peat. When do I star feeding?
I would say day 8
do you start counting days on your chart from when the plant pops out of the soil or once you drop it in the soil
As soon as the seeds sprout(breaches the open air)
So my plant has hairs/ pistols and also looks to have balls as well. What is going on with it? Been on flower for going on three weeks and looks great other than that. The buds look great covered in white longer hairs and all completely sparkly with crystals.
it likely hermed How to Tell Male vs. Female Cannabis
Whats up buddy!!! I wanted to ask when should I use the green flora-gro as it is not listed on the chart for hydro but you said purchase it. Please help I am in week three and noticed i haven’t used it. Thanks for everything
I am new to this and want to do hydroponic systems, can you show me the cheat sheet charts and videos to get everything I will need please
Just navigate the menu and watch all the videos under hydro. They are all essential and cheat sheets are all there
Trying to join discord but it’s giving me problems saying adult channels are not allowed on iOS systems? I’m 33 years old wtf 😳
Anyways living in Arizona and last my very first seedlings to heat damage on our first 95° day. Bringing tent inside instead of in garage now. Forced to use smaller 2x2x4 tent for now. Trying to do 3 small auto flowers in it. The fog from humidifier hose seems to stay heavy and keep top of soil moist. Is this an issue?
https://support.discord.com/hc/en-us/community/posts/360043038491-Age-Verification-badge-to-prove-a-user-s-age
That humidity wont be an issue unless you see the leaves getting droplets on it. However, in bloom, this will definitely result in bud rot. Check the cheat sheets on this site, they list all of the optimal humiditys throughout growth
so with this series we do everything the same with auto flowers besides the data in the cheat sheet?
lighting and nutrient levels are the main differences.
We are first time growing and we didn’t do any toping because we did not know you was to top it what do we do now ?
If you’re before week 5, I would
Can I use your Auto Feeding chart with FoxFarm Cultivation Nation 70:30 or would that change to much?
Never used it or lab tested it so wouldn’t know. You’re welcome to try it out. People have used the same chart on ocean forest successfully
Bro, I’m trying to join the discord it says I’m too young but I am 28 please help me my name on discord is bluntz4Dayz
How to opt in for iOS:
1. Sign in to Discord on desktop and navigate to your User Settings by selecting the cogwheel icon [] in the bottom left corner of the app.
Cogwheel Icon: Access User Settings
2. In User Settings, select Content & Social.
3. Enable Allow access to age-restricted content on iOS by pressing the toggle. This will let you view age-restricted servers you are already a member of from your iOS device.
Allowing Access to Age-restricted Servers on iOS Permission
Additionally, a subset of age-restricted servers that are specifically focused on explicit pornographic content will be blocked entirely on iOS.
iOS users aged 18+ will only be able to join and access these dedicated pornography servers on the desktop and web versions of Discord.
i cloned autoflowers just to see and yep they grew roots , also whats the feed look like for the last 3 weeks ?
depends on what the leaves look like, if theyre green, flush, if theyre yellow, continue feeding just BJ
Hey. I just subscribed to the GWM series and am not sure how to proceed. Where do i go to access the full series after i’ve paid for my subscription?
an email was sent to your gmail, respond to that and let me know you got everything ok
Can I use pro mix hp straight out the bag or do I need to put anything into it before using like all purpose fertilizer or somthing ? Or should I use Happy frog?
You need to use more nutrients than happy frog
Hi I noticed on your cheat sheet it has epson salt and tps silica but never tells you when are how much to add? Are these items needed?
its not necessary, just recommendations I have if you want to use them
3 ml per gallon in silica until week 5 in bloom, tps signal is 3 ml per gallon week 2-5 in bloom only
I really don’t like the updated feed chart, brother
Wish I’d saved the old one
Hey, any way to get the older feed chart format?
I am using soil and not dwc…
I don’t see when to flush soils on new chart.
https://www.howweedgrow.com/sdm_downloads/general-hydroponics-feed-schedule-soil-cheat-sheet/
Is anyone else not able to access the soil chart format? its only coming up for hydroponics would be great if we could get the old chart back
HWGrow Soil General Hydroponics Ultimate Cheat Sheet Feed Schedule
I glad you finally updated this. I’ve been using your grow cheat for I think 4 or 5 years. Many successful grows. My account might be new, but I’m not new here. For some reason I couldn’t log into my old account. Either way, This interactive version is dope as fuck. Thank you for all you do.
Thanks for acknowledging my efforts and glad you got successful grows from the chart. Lots of new video content on the cheat sheet too.